How To Cook Chicken Breast Without Drying It Out
I have more dry and chalky chicken breasts in the trash than I’d like to say. They cut it up with true faith in their hearts, and juice poured all over the cutting board, and yet it was still something they couldn’t swallow without half a bottle of hot sauce. The frustrating part? I was cooking according to recipes. Timed it. I thought I did it right.
It appears that the recipes were not incorrect. I simply didn’t comprehend why the steps were relevant. When it suddenly dawned on me, everything changed.
This is for anyone who has ever been in front of a plate of grey rubbery chicken, wondering what happened to it.
Why Chicken Breast Dries Out
First, you must understand the reasons for this. To be honest, no one wants to get too technical about it — after mastering the idea, each technique in this article becomes clear.
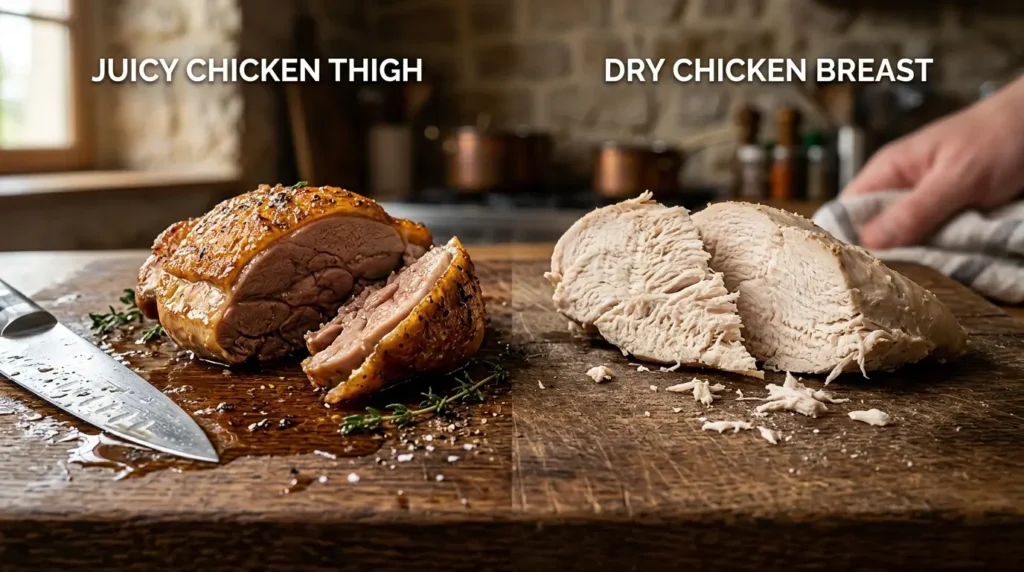
The chicken breast is virtually all lean muscle. Almost no fat. Fat is what will take moisture and flavor into your cooking. It’s found in chicken thighs. But chicken breast does not, chicken thighs tolerate overcooking and chicken breasts don’t.
Let’s take a look at the protein-level of what happens:
Inside the muscle, there are two major proteins: myosin and actin. The protein myosin begins to decompose at about 150°F (65°C). That’s manageable. Its trouble is the presence of actin which becomes denatured at about 170°F (77°C). Actin squeezes out moisture from the muscle fibres by contraction — as you squeeze a wet cloth. After this, there is no need to save up moisture with sauce, basting or a prolonged resting time.
That’s what produces the most dry chicken breast. A lot of home cooks do it without realizing and older food safety guidelines have pushed 180°F. That’s 15 degrees cold as can be.
The USDA’s current recommendation is 165°F (74°C). That’s it. The safe number is that one. All above it is overcooked.
The One Tool That Fixes 80% of the Problem
A meat thermometer. In particular, an instant-read probe thermometer.
You’d think I’d know better, but I didn’t use one when I cooked chicken for years. Timing, cutting and checking colour and pressing with finger. All those are educated guesses. A thermometer is a true statement.
The ThermoWorks Thermapen One reads in just one second, is priced at approximately $100 and is a great value if you cook protein frequently. If it’s too much, the Lavatools Javelin Pro is only about $35 and is very effective. An inexpensive instant-read from any kitchen store, which runs $15–$20, is still a long way better than nothing.
Slide into the thickest portion of the breast, but not touching the pan or baking sheet. As they say, the number you see is what you get.
Pull the chicken at 160°F (71°C). The outer layer of the meat will be hot from the inside due to carryover cooking (left over heat) during the resting period, so the interior will still reach 165°F if you don’t over cook it.
Brine It. Seriously.
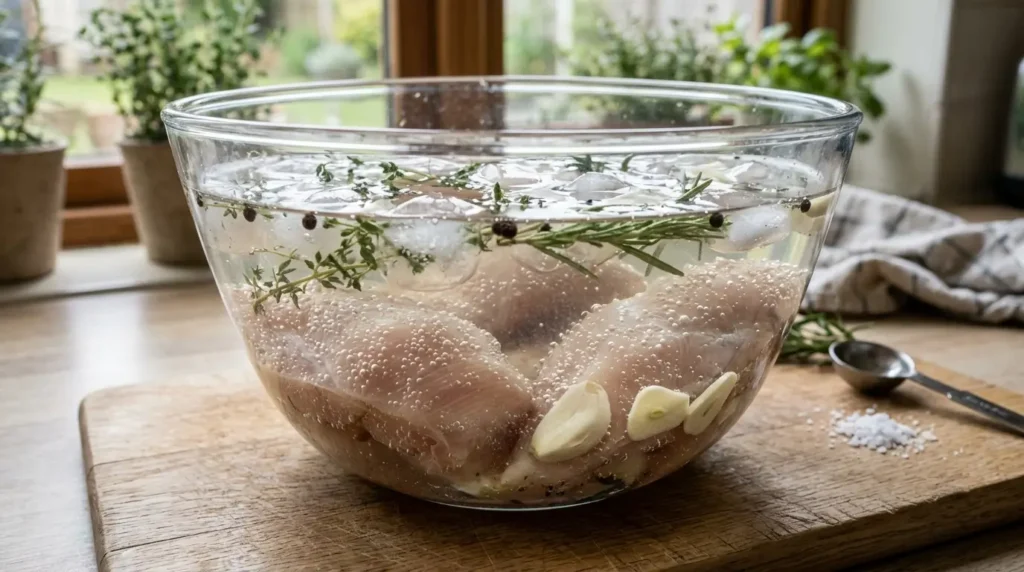
Brining is the second most important factor you can change and most people don’t bother doing it.
The basic wet brine solution is a 4:1 ratio of cold water to kosher salt (plus optional sugar) and is made by dissolving 3 tablespoons of kosher salt (and 1 tablespoon of sugar, if using) in 4 cups of cold water. Immersion (cover the chicken breast). Store in fridge for 30 minutes to 4 hours.
What’s really happening: salt goes into the muscle fibers by osmosis, and slightly alters the surface proteins to bind more water when the food is cooked. Breast takes in about 6–10% of body weight in water and seasoning. The added moisture protection allows you to err on the side of caution.
Keep in mind, however, that the brine should not be on for more than 4 hours. Once they become mushy and soft.
A dry brine is almost as effective as a wet brine if you do not have time to apply the wet brine. Sprinkle with kosher salt on both sides and refrigerate uncovered for 1–24 hours. No need to rinse, the salt will take up in the meat. Another benefit of dry brining is a dry surface, that browns more when seared.
Be careful of marinating with an acidic substance such as lemon juice, vinegar or yogurt: keep it brief. Citrus or vinegar-based marinades: 30 minutes to up to 2 hours. It will be breaking down protein very rapidly, and any “tenderizing” after the 2-hour mark is really a change in texture that is getting mealy and strange.
Pound It to Even Thickness
The shape of chicken breast is natural and teardrop, thick in the middle and thin at one end. The thin end cooks 40–60% faster than the thick end of the loaf. The thick end reaches 165°F while the thin end is already over 180°F.
This can be resolved within 60 seconds. Place breast between plastic wrap or in a ziplock bag. Pound it with a meat mallet, rolling pin or bottom of a heavy saucepan to a thickness of about ¾ inch all over.
When things are even, they’re cooked evenly. There is no sacrifice of any part of the breast for the other part.
Also Read: How to Thicken a Sauce Without Cornstarch 2026
Cooking Methods, Ranked by Forgiveness
Poaching
The easiest way is to go on a poaching spree. The chicken is being cooked to a controlled low temperature and they are cooking it entirely in the liquid; there are hardly any places where moisture can escape.
Place the breast in a wide saucepan, in one layer. Fill with cold water or low sodium chicken broth, leaving an inch of headspace. Include the aromatics: half onion, bay leaf, a few peppercorns, and a celery stalk. Let come to a low boil at medium heat. Do not allow to boil completely, as it will become tough and rubbery.
Cook for 10–18 minutes, depending on the size. Pull at 165°F. Simply soak in liquid for additional 5 minutes before taking it out.
Tender shards of chicken that can be tossed into salads, tacos, sandwiches and pasta. It’s not sexy but it’s dependable.
Oven-Baked
There’s a debate between low-and-slow bakers (350°F/175°C) and high-heat advocates (450°F/230°C). Both can work. I’ve reached 375°F (190°C) as my sweet spot that’s hot enough to achieve some color but not so hot that the outside is overcooked before the inside has a chance to reach the proper temperature.
Steps:
- Preheat oven to 375°F (190°C)
- Bring to a boil and pat the breast dry after 30 minutes
- Cut even thickness from the ends of the Pound
- Brush with olive oil and add salt and pepper
- Put on a pan lined with a rim or a cast iron skillet
- Depending on size bake 20–28 minutes; check at 20 minutes
- The carryover will complete the job at 160°F
- Wait 5 minutes to cut before it cools
What really caught my eye and didn’t expect was to coat the breast with a thin film of mayonnaise rather than oil. The fat and egg in the mayo provides a mild barrier and the breast will be much more moist. Sounds odd. Works well.
| Breast Weight | Time at 375°F |
|---|---|
| 5–6 oz | 20–22 min |
| 7–8 oz | 23–25 min |
| 9–10 oz | 26–28 min |
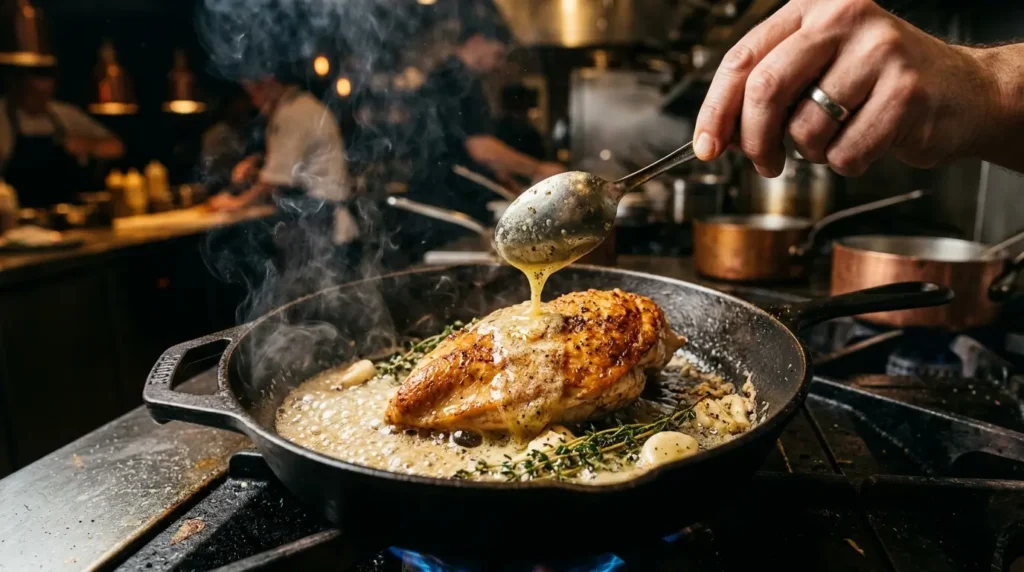
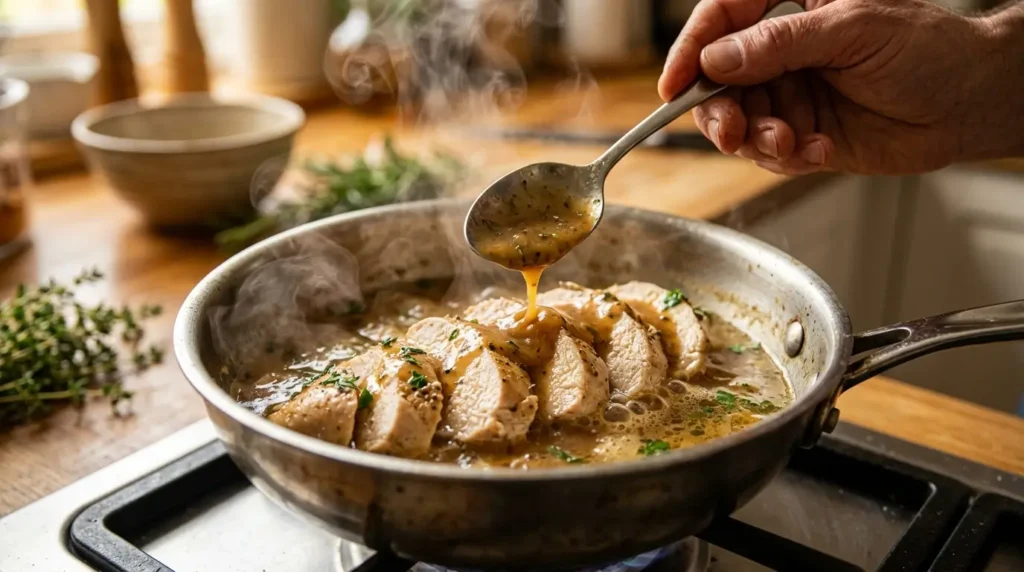
Pan-Seared with Butter Basting
I use this method most often on weeknights since the crust is usually perfect, the flavors are great from the Maillard reaction and if you do it slowly, it will have a super juicy middle.
The Maillard reaction occurs when protein and sugars are exposed to high temperatures and get brown. It makes hundreds of flavor compounds that brining and poaching cannot. The addition of that golden crust also provides a slight moisture seal to the surface.
Steps:
- Pat the breast completely dry — moisture steams instead of sears
- Add salt and pepper to taste
- Over medium-high heat in a cast iron or stainless steel skillet, until it is actually hot
- Add 1 tablespoon of neutral oil (avocado oil or canola oil — NOT olive oil, which burns at this temperature)
- Lay baby’s tummy over the side. Avoid touching for 5–6 minutes
- Flip once
- At the end add a knob of butter, 2 garlic cloves and a sprig of thyme. Tip the pan and pour the butter over the breast all the time
- Rest 5 minutes at 160°F, pull
The butter basting is what restaurants do. It speeds up cooking on top while you don’t have to flip over again, provides fat-based moisture, and the garlic and herbs fill your entire breast.
Grilling
Grilling is the greatest danger as both sides are affected by direct and intense heat. The remedy is a two stage process: sear the breast over direct high heat for 3–4 minutes on each side until it’s coloured, then finish in a second zone (the cool side of the grill, the lid closed) to cook gently.
Always oil or brine the breast before placing on the grill. Oil the grates too.
If you are in the UK, “grilling” here refers to cooking in the outdoors over a flame or coals. In the United States, that’s known as broiled, but in the UK, it’s called grilled.
Take off the grill at 160°F. The remaining will heat to 165°F.
Slow Cooker
The slow cooker is the easiest option since the moisture is continuously moving inside the closed system. Add broth or sauce (½ cup) and cook on LOW for 3–4 hours. Take the temperature reading at 3 hours.
Take note: not more than 2 hours on HIGH. Despite all that steam, prolonged high heat will make lean chicken breast dry.
Air Fryer
The air fryer operates at a high speed with hot air circulation. They’re quick but if you set the temperature too high you run the risk of drying.
Keep it at 375°F (190°C) — not 400°F as many recipes suggest. Brush with oil before cooking. Bake for 14–18 minutes, turning once, until it is golden brown. Rest 3–4 minutes. Always check the temperature, never depend on the time.
Sous Vide
In the case of a sous vide circulator, chicken breast is a good reason to have one. The water bath is set up at the desired temperature: 145°F (63°C) for a very tender, almost silky texture that will last for 1–2 hours, or 150°F (66°C) for a more traditional texture.
Remove from the bath, pat dry and sear for 60–90 seconds each side, just for color, in a screaming hot cast iron pan. The inside is already done and perfect. The crust forms on the outside.
It’s as close to a cheat code for juicy chicken breast as it gets.
What to Do When Chicken Is Already Dry
No one talks about this and it’s something that happens to everybody.
If the breast is dry, it is not a sign of spoilage; don’t be alarmed. You have options:
- Slice thin and simmer in broth. Pour ½ cup of warm chicken broth into a small saucepan and add the thin slices. Simply heat on low for 3–4 minutes. The slices will not regenerate totally but they will absorb moisture and become edible again.
- Shred and make a sauce. In a cream sauce, tomato sauce or salsa, shredded chicken disappears in the sauce. It doesn’t come as a surprise that it’s dry.
- Make a soup or stew. Cook a broth based soup until 10 minutes is left, then add in the rough chunks. The simmer hydrates it a bit and the broth makes up for it.
- Chicken salad. Add sufficient amount of mayo, Greek yogurt or avocado, and the issue of dryness is forgotten. Include celery, pickles and a squeeze of lemon. Works every time.
Frozen Chicken Breast — What Changes
It is possible to cook straight from the frozen state but requires some adjustments. The thickness problem is compounded by the surface and center thawing at different rates.
When cooking from frozen add 50% to the cooking time and test the heat frequently. Brining won’t do anything for frozen chicken, thaw first, then brine. Another option is to put the breast in a zip-lock bag in the cold water for 30–45 minutes, which will thaw most breasts without setting the food safety clock.
Reheating Without Drying It Out Again
There are numerous ways that chicken breast can be reheated, but most of them destroy the leftover meat in the pan. It is unevenly heated by the microwave. The rest is done with a dry skillet.
Better options:
- Cruise it and set in a skillet with 2 tablespoons of broth, cover with a lid and cook on low for 3–4 minutes
- Place in a foil package, add a bit of water, and return to the oven for a further 10–12 minutes at 325°F (165°C)
- Use containers specifically made for meal prepping: 1 tablespoon of broth is added directly to the container before it is put into the microwave, the container is covered and heated at 50% power
Pink Chicken Is Not Always Raw Chicken
This one can really cause a lot of anxiety for lots of people. If chicken thermometer reads 165°F in thickest part of the meat, but the meat is still a little pink, it’s fine to eat.
The reason for the pink color in cooked poultry is myoglobin, an iron-rich protein that may not lose its color even at safe cooking temperatures. This can also happen if the meat is frozen before cooking, where bone marrow pigment can seep into the meat.
According to the USDA, it is safe if it reaches 165°F. Color is not a good indicator of safety. That’s why having a thermometer is more important than any visual inspection!
Mistakes That Dry Out Chicken Breast
- Preparing food directly from the refrigerator. If you put cold chicken in a hot pan there is a big difference in cooking. First allow to stand at room temperature for 15–20 minutes.
- Failure to use a thermometer. This time depends on the oven, breast size and temperature when the oven is first heated. The reason chicken dries out is because they guess.
- Skipping the brine. Just 30 minutes in salt water will make a difference.
- Uneven thickness. Pounding takes 60 seconds — it’s well worth the time.
- Cook thoroughly until very hot. Searing on high, then on medium to finish or to the oven is better than a long time on high.
- Cutting before resting. Rest for 5 minutes is not at your discretion. The difference between juice on the plate and juicy meat.
- Overcrowding the pan. If you have too much chicken in the cold pan, it will steam rather than sear. Cook in batches, if necessary.
For Meal Prep Specifically
When you’re preparing a week’s worth of chicken breast, the easiest way to do this is to poach them. It can be scaled up easily and doesn’t require multiple pans to be monitored and doesn’t need to be strained after cooking and can be used as broth.
After cooking allow the breast to cool in the poaching liquid before placing in containers. This helps to maintain the moisture level on the surface during fridge rest. Before freezing, add broth to each portion for moisture when reheating (1 tablespoon per portion).
Properly stored poached chicken breast keeps 4 days in the refrigerator and 3 months when frozen.
FAQs
Why does my chicken breast always come out dry even when I follow the recipe?
These are approximate cooking times. They do not consider your oven’s temperature setting, the actual weight of your breast or whether it was at room temperature or came straight from the fridge! The only way to tell is by using the internal body temperature. Purchase a thermometer, pull at 160°F (carryover cooking will reach 165°F at rest).
Is it safe to eat chicken at 160°F?
Yes, technically. According to the USDA’s pasteurization rule, it’s safe to cook chicken as long as it reaches a high enough temperature for a short enough period of time. Resting the meat at 160°F and only for 5 minutes should be adequate, but not harmful to the product for juicy and safe.
Should I cover chicken breast when baking?
Loosely covering with foil for first half of baking will keep steam in and prevent surface drying. Let foil off for last 8–10 minutes to let brown. To achieve a more crusty texture, do not use the foil, but oil or butter the chicken half way through.
Can I brine chicken for too long?
Yes. After 4 hours anything will begin to get soft and mushy, the salt will keep on unfolding the protein structure. For most weeknight cooking, 30–60 minutes is the preferred length of time. A dry brine is more forgiving and will work for up to 24 hours.
Does pounding chicken breast actually help?
A lot. This is because chicken breasts are not perfectly round, which means that the thin end cooks before the thick end is cooked all the way through. It takes 60 seconds to pound it to ¾ inch in thickness, and eliminates all cooking problems. It also cuts overall cooking time by a whopping 20–30%.
How do restaurants keep chicken breast so moist?
A few of the ways: they brine or dry-brine in large quantities beforehand; they have digital probe thermometers — not just a luxury; they lower the temperature in the oven after browning before finishing; they rest all the pieces before passing them. The basics are similar to those you can do at home. It’s simply a matter of consistency and habit.
Can you overcook chicken breast in a slow cooker?
Yes, but it’s a slower process than others. Chicken breast will be safe in general for 3–4 hours on the LOW setting. Lean breast meat will begin to dry and fall apart in a moist environment anywhere beyond 5–6 hours LOW or beyond 2 hours HIGH. Take the temperature at 3 hours.
What is the best oil to use when searing chicken breast?
Use a neutral high-heat oil: avocado oil (smoke point ~520°F / 270°C) or refined canola oil (~400°F / 205°C). Extra virgin olive oil fries at a high enough temperature to smoke, spice up and ruin the crust. Use olive oil for lower heat cooking and finishing.
Why is my chicken pink even though the thermometer says 165°F?
Myoglobin (a protein that will not change color at safe temperatures) or bone marrow pigment (if the chicken was frozen prior to cooking) causes the pink color in poultry during cooking. If the thermometer reads 165°F at the thickest spot, then the chicken is safe to eat. Cooking time is NOT a good indicator of color.
Leave a Reply